

Hematoxylin and eosin (H&E) staining is the most commonly used technique in histology and pathology.
It provides a clear and reliable view of tissue structure by staining cell nuclei blue-purple and the cytoplasm pink.
This simple color contrast allows pathologists to easily identify normal and abnormal tissue features, making H&E staining essential for disease diagnosis, particularly in cancer.
This guide provides a clear overview of H&E staining, including its principles, step-by-step protocol, key applications in histopathology, interpretation of stained tissue sections, and practical tips for troubleshooting common issues.
What is H&E Staining?
Hematoxylin and eosin staining (H&E Staining) is a fundamental technique used in histology and pathology to visualize the microscopic structure of biological tissues.
It is considered the gold standard for tissue staining because of its ability to clearly differentiate between various cellular components, allowing pathologists to detect abnormalities such as cancer, inflammation, and tissue damage.
The technique involves two dyes: hematoxylin and eosin, which stain specific parts of the cell differently.
Hematoxylin is a basic dye that binds to acidic structures, primarily staining the nuclei of cells a blue or purple color. This highlights the genetic material (DNA) and nuclear details essential for identifying cellular abnormalities.
On the other hand, eosin is an acidic dye that stains the cytoplasm and extracellular matrix a pink or red color. This contrast between the nucleus and cytoplasm provides a clear view of the tissue’s overall structure and organization.
H&E staining is widely used because it offers a balance between simplicity and diagnostic value. It provides essential information on:
- Cell morphology: The shape, size, and organization of cells.
- Tissue architecture: The arrangement of cells within tissues and organs.
- Pathological changes: Abnormalities such as tumors, necrosis, or fibrosis.
H&E Staining Protocol
Time needed: 59 minutes
This step-by-step guide outlines the entire process, from tissue preparation to slide mounting visualisation, ensuring high-quality and reproducible results.
- Tissue Preparation
Fixation: Tissues are fixed using formalin to preserve cellular details and prevent degradation.
Paraffin Embedding: Fixed tissues are embedded in paraffin wax to provide support for sectioning.
Sectioning: Thin sections (3–5 µm) are cut using a microtome and mounted on glass slides. - Deparaffinization and Rehydration
Place slides in xylene to dissolve the paraffin.
Rehydrate the tissue by passing the slides through a series of graded alcohol solutions (100%, 95%, 70%) and finally into distilled water. - Hematoxylin Staining (Nucleus Staining)
Immerse slides in hematoxylin solution for 5–10 minutes.
Rinse the slides in running tap water to remove excess stain.
Perform the bluing step by immersing slides in ammonia water or lithium carbonate solution for 30 seconds to 1 minute.
Rinse again in running water. - Differentiation (Optional)
If the nuclear staining is too intense, briefly dip the slides in an acid alcohol solution to differentiate and remove excess hematoxylin.
Rinse with tap water to stop the differentiation process. - Eosin Staining (Cytoplasm Staining)
Immerse the slides in eosin solution for 1–3 minutes.
Rinse briefly in distilled water. - Dehydration and Clearing
Pass the slides through graded alcohol solutions (70%, 95%, 100%) to remove water.
Clear the tissue sections by immersing them in xylene, which makes the tissue transparent. - Mounting the Slides
Apply a few drops of mounting medium (e.g., DPX) on the tissue section.
Carefully place a cover slip over the section, avoiding air bubbles. - Microscopic Examination
Observe under a light microscope.
Evaluate nuclear detail (blue) and cytoplasmic/extracellular structures (pink).
Applications of H&E Staining in Histopathology
Hematoxylin and eosin (H&E) staining plays a vital role in histopathology, the branch of pathology focused on the microscopic examination of tissue to study the manifestations of disease.
1. Cancer Diagnosis and Classification
H&E staining is indispensable in identifying and classifying various types of cancers.
- Tumor Identification: By highlighting differences in tissue architecture, H&E staining helps detect tumor margins and invasion patterns.
- Grading and Staging: It allows the evaluation of tumor grade by analyzing nuclear features, mitotic activity, and cellular differentiation—crucial factors for prognosis and treatment planning.
- Histological Subtyping: Specific cancer types, such as adenocarcinomas, squamous cell carcinomas, or lymphomas, exhibit unique histological features visible with H&E staining.
Example: In bladder cancer, H&E staining helps differentiate between non-muscle-invasive and muscle-invasive tumors based on how deeply the cancer cells penetrate the bladder wall.
2. Identifying Inflammatory and Infectious Diseases
H&E staining helps distinguish between acute and chronic inflammation by revealing changes in cellular infiltrates and tissue structure.
- Acute Inflammation: Characterized by the presence of neutrophils.
- Chronic Inflammation: Marked by lymphocytes, macrophages, and fibrosis.
- Infections: H&E can detect tissue responses to bacterial, viral, fungal, or parasitic infections by showing characteristic cellular patterns and damage.
3. Diagnosing Degenerative Diseases
H&E staining reveals degenerative changes in tissues that can indicate diseases such as:
- Liver cirrhosis: Shows fibrosis and regenerative nodules.
- Kidney disease: Highlights glomerular damage and tubular atrophy.
- Neurodegenerative disorders: Demonstrates neuronal loss and gliosis in brain tissues.
4. Evaluating Surgical Margins
After tumor removal, pathologists use H&E staining to check if the surgical margins are free of cancer cells.
- Negative margins: Indicate that no cancer cells are present at the edge of the removed tissue, suggesting complete tumor removal.
- Positive margins: Suggest that cancerous tissue remains, requiring further treatment.
5. Supporting Immunohistochemistry (IHC) and Molecular Studies
H&E-stained slides often serve as a reference for more advanced diagnostic techniques.
- Immunohistochemistry (IHC): H&E staining helps select appropriate tissue areas for further analysis using specific antibodies.
- Molecular Pathology: Techniques like PCR, FISH, and next-generation sequencing rely on well-characterized tissue samples, for which H&E staining provides foundational morphological insights.
Interpretation of Hematoxylin and Eosin-Stained Tissue Sections
1. Identifying Normal Tissue Architecture
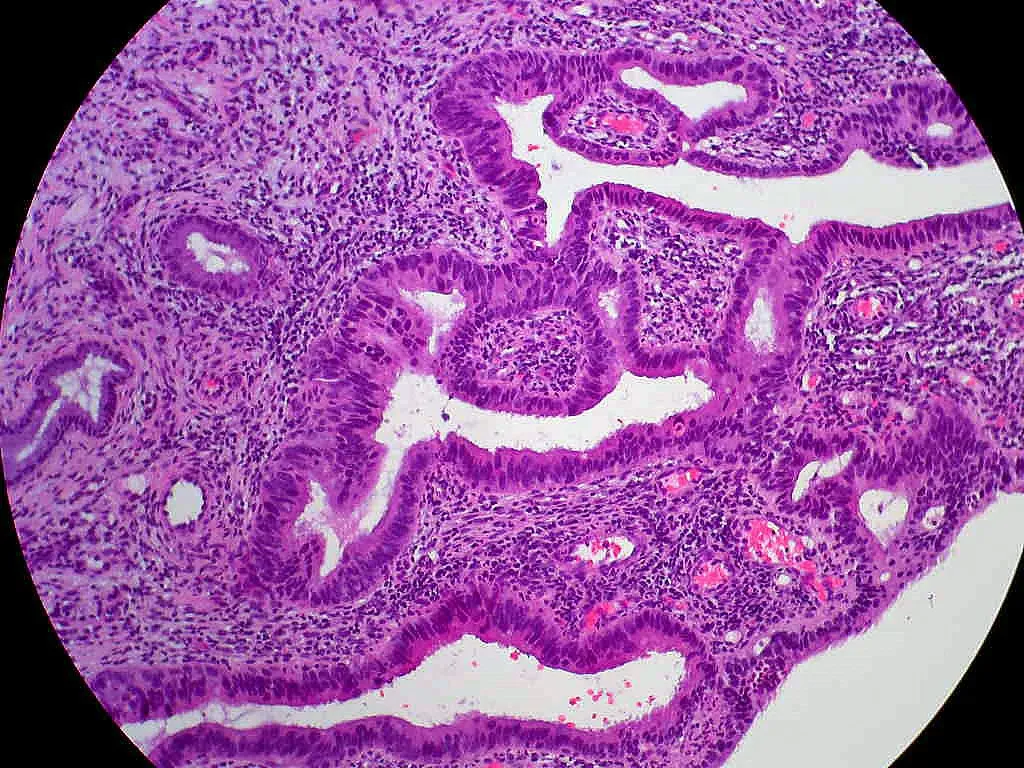
H&E staining provides contrast between different cellular and extracellular components:
- Nuclei: Stained blue to purple by hematoxylin, allowing assessment of size, shape, chromatin distribution, and mitotic figures.
- Cytoplasm: Stained pink to red by eosin, helping differentiate cell types and structures.
- Extracellular Matrix (ECM): Collagen, muscle fibers, and connective tissues appear in varying shades of pink, helping assess structural integrity.
Example: In normal epithelial tissues, nuclei appear evenly spaced with a uniform chromatin pattern, while the cytoplasm maintains a consistent eosinophilic tone.
2. Recognizing Pathological Changes
H&E staining is key to identifying abnormal histological features that indicate disease.
A. Nuclear Abnormalities (Indicators of Malignancy)
- Nuclear Enlargement (Anisokaryosis): Irregularly large nuclei suggest rapid cell proliferation, often seen in cancerous tissues.
- Hyperchromasia: Dark-staining nuclei due to increased DNA content, common in malignancies.
- Irregular Nuclear Borders: Indicative of dysplasia or invasive carcinoma.
- Increased Mitotic Figures: A higher number of dividing cells suggests aggressive tumor growth.
Example: In bladder cancer, tumor cells often exhibit enlarged, hyperchromatic nuclei with prominent nucleoli, indicating malignancy.
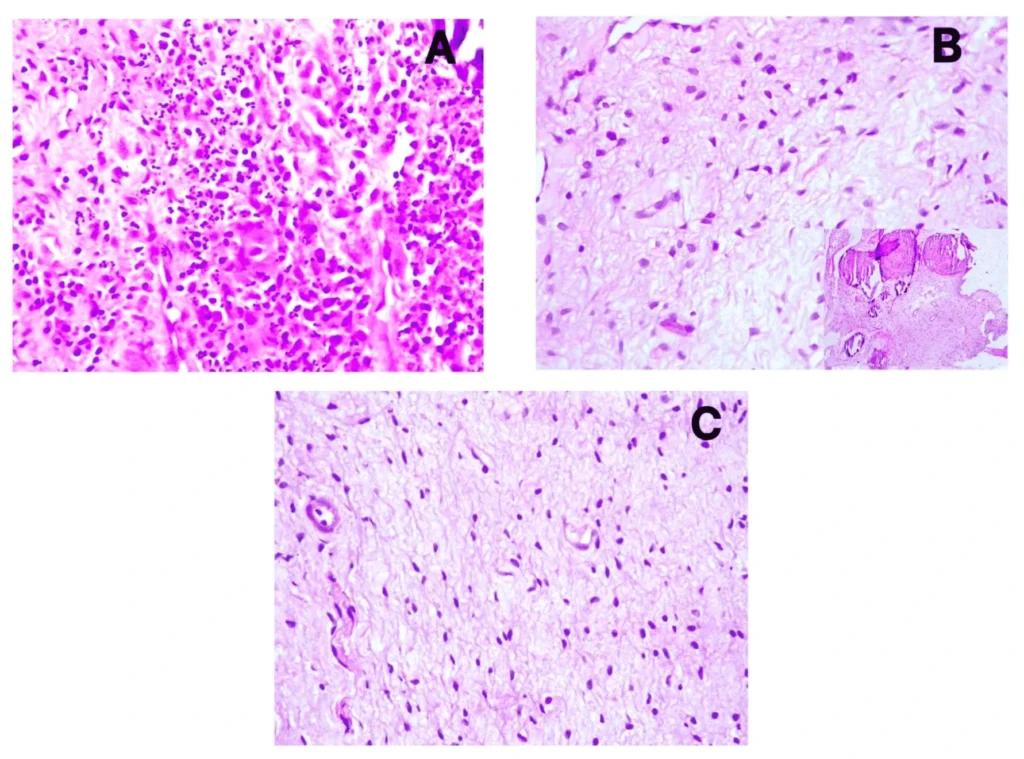
B. Cytoplasmic Changes
- Eosinophilia (Increased Pink Staining): Seen in necrosis, muscle cells, or apoptotic cells.
- Pale or Vacuolated Cytoplasm: Suggests fatty degeneration, mucin production, or glycogen accumulation.
- Granular Cytoplasm: Indicates inflammatory or metabolic conditions.
Example: In liver cirrhosis, hepatocytes may exhibit vacuolated cytoplasm due to fat accumulation, known as steatosis.
C. Tissue Architecture Disruptions
- Loss of Polarity: Cells lose their organized structure, seen in high-grade dysplasia and cancerous tissues.
- Necrosis: Dead cells appear eosinophilic with pyknotic (shrunken) or fragmented nuclei.
- Fibrosis: Excess collagen deposition in chronic inflammation appears intensely eosinophilic.
Example: In chronic kidney disease, glomerular fibrosis and tubular atrophy lead to disrupted tissue organization.
3. Detecting Inflammation and Infection
H&E staining helps differentiate between acute and chronic inflammation based on cellular infiltration.
- Acute Inflammation: Presence of neutrophils with multi-lobed nuclei and eosinophilic cytoplasm.
- Chronic Inflammation: Dominated by lymphocytes (small dark nuclei) and macrophages.
- Granulomas: Aggregates of macrophages surrounded by lymphocytes, seen in tuberculosis and sarcoidosis.
Example: In bacterial infections, neutrophils cluster around infected tissues, while in viral infections, lymphocytes dominate.
This post may contain affiliate links. As an Amazon Associate, I earn from qualifying purchases at no extra cost to you.
For accurate interpretation of H&E-stained slides, a compound microscope like this one provides the magnification needed to clearly distinguish nuclei and cytoplasmic structures.

- This is an ideal microscope for home school or for students in elementary to high school to learn sciences
- 360 degree rotatable monocular head offers five magnification settings 40X, 100X, 250X, 400X & 1000X
- Widefield all optical glass elements includes single lens condenser with disc diaphragm
Troubleshooting Common H&E Staining Issues
Although Hematoxylin and Eosin Staining (H&E) is a standard method, technical issues can affect staining quality. Here are the most common problems and quick fixes:
- Pale nuclei (weak hematoxylin)
Increase staining time, reduce differentiation, or use fresh hematoxylin. - Overstained nuclei (too dark)
Shorten hematoxylin exposure and ensure proper differentiation. - Pale cytoplasm (weak eosin)
Extend eosin staining time and avoid excessive washing. - Overstained cytoplasm (too pink)
Reduce eosin time and improve washing steps. - Background staining
Ensure proper deparaffinization and use clean, fresh reagents. - Hazy sections (incomplete deparaffinization)
Increase xylene time and check reagent quality. - Uneven or patchy staining
Ensure uniform slide preparation and proper reagent coverage. - Artifacts (false structures)
Improve sectioning technique, avoid bubbles, and filter stains regularly. - Poor bluing (reddish nuclei)
Use appropriate bluing reagent and allow sufficient time.
Recommended Histology Books
Understanding H&E staining becomes much easier when you can compare real tissue sections. Many students and researchers use histology atlases to improve their interpretation skills.
Color Atlas and Text of Histology
A beginner-friendly histology atlas that combines clear explanations with well-labeled color micrographs, making it easier to recognize tissues and understand basic microscopic structures.
Junqueira’s Basic Histology
A comprehensive and widely used textbook that integrates concise theory with high-quality micrographs and illustrations, helping students understand tissue structure and function across all organ systems.
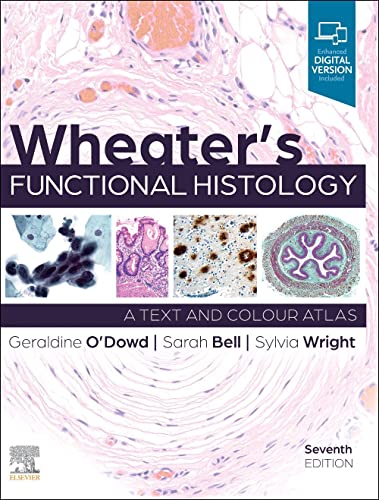
Wheater’s Functional Histology
A visually rich atlas focused on functional interpretation of tissues, featuring detailed color images and practical explanations ideal for learning how to analyze histological slides.
FAQs
H&E staining is a routine histology technique where hematoxylin stains nuclei blue-purple and eosin stains cytoplasm pink, allowing clear visualization of tissue structure.
It refers to the reagents, protocol, and equipment used to perform H&E staining, either manually or with automated stainers.
A high-quality stain shows sharp blue nuclei, clear pink cytoplasm, good contrast, and minimal background staining.
It is used to examine tissue morphology and diagnose diseases, especially cancer, in histopathology.
H&E staining typically takes 45 to 90 minutes, depending on the protocol and whether the process is manual or automated.
H&E staining is essential because it provides a clear overview of tissue architecture, helping pathologists identify abnormalities and make diagnoses.
References
- Alani, N.A.; Abdullah, B.H. Differential Regulation of Angiogenesis, Lymphangiogenesis, and Neural Tissue in Normal and Inflamed Dental Pulp: Immunohistochemical Analysis. Diagnostics 2025, 15, 1819. https://doi.org/10.3390/diagnostics15141819
- Fischer AH, Jacobson KA, Rose J, Zeller R.
Hematoxylin and eosin staining of tissue and cell sections.
Cold Spring Harbor Protocols. 2008;2008(5):pdb.prot4986.
DOI: https://doi.org/10.1101/pdb.prot4986 - Bancroft’s Theory and Practice of Histological Techniques Book • Eighth Edition • 2019
- Titford M.
The long history of hematoxylin.
Biotechnic & Histochemistry. 2005;80(2):73–78.
DOI: https://doi.org/10.1080/10520290500138372 - Titford M.
Progress in the development of microscopical techniques for diagnostic pathology.
Journal of Histotechnology. 2009;32(1):9–19.
DOI: https://doi.org/10.1179/his.2009.32.1.9 - Dapson RW.
Hematoxylin and eosin staining: principles and practice.
Biotechnic & Histochemistry. 2007;82(1):1–7.
DOI: https://doi.org/10.1080/10520290701333555 - Kiernan JA.
Formaldehyde, formalin, paraformaldehyde and glutaraldehyde: What they are and what they do.
Microscopy Today. 2000;00-1:8–12.
DOI: https://doi.org/10.1017/S1551929500057060 - World Health Organization.
WHO Classification of Tumours Series.
https://tumourclassification.iarc.who.int
